Showing posts with label ORACLE APPS. Show all posts

Friday, July 31, 2026

Fixing Oracle EBS 12.2 Clone Failure on RHEL8 — The refhost.xml Workaround

Fixing Oracle EBS 12.2 Clone Failure on RHEL8 — The refhost.xml Workaround

Fixing Oracle EBS 12.2 Clone Failure on RHEL8 — The refhost.xml Workaround

By Punit Kumar | Oracle EBS DBA | July 2026


Background

While performing an Oracle E-Business Suite 12.2 appsTier clone from Production to UAT, I encountered a series of prerequisite check failures. The target server was running Red Hat Enterprise Linux 8.10 (RHEL8). The EBS environment had AD and TXK at Delta 17. What seemed like a straightforward clone turned into a deep dive into Oracle's FMW prerequisite certification framework.

This article documents exactly what happened, why it happened, and how I fixed it — so you don't have to spend hours figuring it out yourself.


The Environment

  • Oracle E-Business Suite 12.2
  • AD and TXK Delta 17
  • Source: Production (RHEL8)
  • Target: UAT (RHEL8)
  • Clone type: appsTier

First Error — Log File Handler Failure

The first thing I noticed in the install log was this:


OiiolLogger.addFileHandler: Error while adding file handler
java.io.FileNotFoundException: .../clone/FMW/logs/prereqcheck.log 
(Not a directory)

The Oracle Universal Installer was trying to create timestamped log files inside a path called prereqcheck.log, expecting it to be a directory. However, a previous failed clone attempt had left prereqcheck.log as a flat file. The fix was straightforward — rename the file and remove it so the next run could manage it correctly.


rm -rf /u01/applruat/fs2/EBSapps/comn/clone/FMW/logs/prereqcheck.log

Important note here — do not recreate it as a directory either. A different Java class called FMWOracleHomePreReqCheck expects to create prereqcheck.log as a file itself. If you create it as a directory, that process will fail with AC-00002. The safest approach is to simply remove it and let the clone process manage it.


Second Error — oraInventory Logs Directory Missing


ODL-52008: unable to create log directory: /u01/applruat/oraInventory/logs

The Oracle Diagnostic Logging framework could not initialize because the logs directory under oraInventory did not exist. This caused all prereq checks to show "Not executed" rather than actually running.


mkdir -p /u01/applruat/oraInventory/logs
chown -R applruat:oinstall /u01/applruat/oraInventory
chmod -R 755 /u01/applruat/oraInventory

Third Error — oraInst.loc Wrong Parameter

While checking the Oracle inventory configuration I found:


inventory_loc=/u01/applruat/oraInventory
inst_loc=dba

The parameter name inst_loc is invalid. The correct parameter is inst_group and the value should match the group that owns the oraInventory directory. I confirmed this using:


ls -ld /u01/applruat/oraInventory
id applruat

The directory was owned by oinstall group so the fix was:


cat > /etc/oraInst.loc << EOF
inventory_loc=/u01/applruat/oraInventory
inst_group=oinstall
EOF

This same wrong parameter was found on multiple environments including Production, which had been running with this misconfiguration silently for a long time.


The Main Problem — refhost.xml Missing RHEL8 Entry

After fixing the above issues the prereq checks started actually executing. The CertifiedVersions check now ran but failed with the OS not being recognized. The root cause was in this file:


$COMMON_TOP/clone/prereq/webtier/Scripts/prereq/linux64/refhost.xml

This XML file is Oracle's certification registry. It tells the OUI and FMW prereq framework which operating system versions are certified for installation. When I opened the file I found entries for RHEL4, RHEL5, RHEL6, RHEL7 — but nothing for RHEL8.

The file had a last modified date of November 2024, meaning it had not been updated despite the servers being on RHEL8.


Why Did This Happen

This is an important question. The servers had been upgraded from RHEL7 to RHEL8 at the OS level. However the EBS filesystem under /u01/applruat was completely untouched during the OS upgrade. The refhost.xml file is not part of the OS — it is part of the EBS software stack and was originally installed when the appsTier was first laid down on RHEL7.

AD and TXK Delta 17 was applied but this delta did not deliver an updated refhost.xml with RHEL8 certification for the FMW webtier prereq framework. RHEL8 certification for EBS 12.2 FMW components came via specific supplemental patches rather than the main AD-TXK delta rollup.

The result was that Production had been running on RHEL8 for an extended period in a technically uncertified state from the FMW prereq perspective. Nobody noticed because the running EBS system is not affected by this file at runtime — it only matters during clone, patch, and install operations.


The Fix — Adding RHEL8 to refhost.xml

The workaround is to manually add an RHEL8 certified OS block to refhost.xml by copying the existing RHEL7 redhat block and changing the version number.

First back up the original:


cp /u01/applruat/fs2/EBSapps/comn/clone/prereq/webtier/Scripts/prereq/linux64/refhost.xml \
   /u01/applruat/fs2/EBSapps/comn/clone/prereq/webtier/Scripts/prereq/linux64/refhost.xml.bak_$(date +%Y%m%d)

Then open the file and locate the CERTIFIED_SYSTEMS opening tag. Insert the following block immediately after it:


<!-- RHEL8 entry added as workaround - copied from RHEL7 block -->
<OPERATING_SYSTEM>
    <VERSION VALUE="8"/>
    <ARCHITECTURE VALUE="x86_64"/>
    <NAME VALUE="Linux"/>
    <VENDOR VALUE="redhat"/>
    <GLIBC ATLEAST="2.17">
    </GLIBC>
  <PACKAGES>
        <PACKAGE NAME="binutils" VERSION="2.23.52.0.1" />
        <PACKAGE NAME="libgcc" VERSION="4.8.2" ARCHITECTURE="x86_64"/>
        <PACKAGE NAME="libstdc++" VERSION="4.8.2" ARCHITECTURE="x86_64"/>
        <PACKAGE NAME="libstdc++-devel" VERSION="4.8.2" ARCHITECTURE="x86_64"/>
        <PACKAGE NAME="sysstat" VERSION="10.1.5" />
        <PACKAGE NAME="gcc" VERSION="4.8.2" />
        <PACKAGE NAME="gcc-c++" VERSION="4.8.2" />
        <PACKAGE NAME="ksh" VERSION="..." />
        <PACKAGE NAME="make" VERSION="3.82" />
        <PACKAGE NAME="glibc" VERSION="2.17" ARCHITECTURE="x86_64"/>
        <PACKAGE NAME="glibc-devel" VERSION="2.17" ARCHITECTURE="x86_64"/>
        <PACKAGE NAME="libaio" VERSION="0.3.109" ARCHITECTURE="x86_64"/>
        <PACKAGE NAME="libaio-devel" VERSION="0.3.109" ARCHITECTURE="x86_64"/>
  </PACKAGES>
  <KERNEL>
        <PROPERTY NAME="VERSION" VALUE="3.10.0"/>
        <PROPERTY NAME="hardnofiles" VALUE="4096"/>
        <PROPERTY NAME="softnofiles" VALUE="4096"/>
  </KERNEL>
</OPERATING_SYSTEM>
<!-- End of RHEL8 workaround entry -->

Why compat-libcap1 and compat-libstdc++-33 Were Excluded

When the prereq Packages check ran after adding the RHEL8 block (initially copied with all RHEL7 packages), two packages failed:


Checking for compat-libcap1-1.10; Not found.       Failed
Checking for compat-libstdc++-33-3.2.3; Not found. Failed

Both of these packages were dropped in RHEL8. They were legacy GCC 3.x compatibility libraries from the RHEL5 and RHEL6 era that Oracle never removed from the RHEL7 package list in refhost.xml. They are not required for EBS 12.2 FMW WebTier to function on RHEL8.

The fix was to simply not include them in the RHEL8 block. All 13 remaining packages passed cleanly as RHEL8 ships with newer versions of all of them, and the version check is a minimum baseline comparison not an exact match.


Do You Need to Change Package Version Numbers

No. The prereq check compares installed package versions against the minimum baseline defined in refhost.xml. Since RHEL8 ships with newer versions of all required packages, they will all satisfy the minimum version requirements defined in the RHEL7-era values. For example:

  • refhost.xml requires glibc 2.17 — RHEL8 has glibc 2.28, which passes
  • refhost.xml requires gcc 4.8.2 — RHEL8 has gcc 8.5.0, which passes
  • refhost.xml requires make 3.82 — RHEL8 has make 4.2.1, which passes

Apply the Same Fix to All refhost.xml Locations

There are multiple refhost.xml files in an EBS 12.2 appsTier filesystem. The pasteBinary.sh process used by the clone framework has its own independent prereq check that reads from a different location. Find all of them and apply the same fix:


find /u01/applruat/fs2 -name "refhost.xml" 2>/dev/null

Apply the RHEL8 block to each location found. If pasteBinary continues to fail on prereqs despite the refhost.xml fix, Oracle provides a built-in bypass flag:


pasteBinary.sh ... -executeSysPrereqs false

The Bigger Picture — Production Was Also Affected

After fixing UAT I checked Production and found the same issue. The Production refhost.xml also had no RHEL8 entry, and the oraInst.loc had the same wrong parameter on Production as well. Production had been running on RHEL8 with a technically uncertified FMW prereq configuration since the OS upgrade.

This is a systemic issue that affects any EBS 12.2 environment where:

  • The appsTier was originally installed on RHEL6 or RHEL7
  • The OS was subsequently upgraded to RHEL8
  • No specific Oracle patch was applied to update the FMW prereq certification files

Permanent Fix Recommendation

The manual workaround works but needs to be maintained. For a permanent fix:

  • Check MOS Note 2500278.1 for running EBS 12.2 on RHEL8
  • Check MOS Note 1369010.1 for EBS 12.2 certified platforms
  • Raise an Oracle SR requesting the specific patch that delivers RHEL8 certification in refhost.xml for your FMW version
  • Keep a backed-up copy of your patched refhost.xml outside the EBS filesystem since AD-TXK patches can overwrite it silently
  • Add a step in your clone runbook to verify RHEL8 block is present after each AD-TXK patch application

Clone Runbook Checklist for RHEL8 Environments

Before every appsTier clone on RHEL8, verify:


1. prereqcheck.log does not exist under clone/FMW/logs/
2. oraInventory/logs directory exists with correct ownership
3. oraInst.loc has inst_group=oinstall (not inst_loc)
4. refhost.xml has RHEL8 block without compat-libcap1 and compat-libstdc++-33
5. All refhost.xml locations are patched (use find command)
6. Filesystem has sufficient free space
7. Running as correct OS application user

Conclusion

What started as a clone failure turned out to be a combination of stale certification metadata, leftover files from previous failed attempts, and a misconfigured inventory pointer — all stemming from the same root cause: the EBS software stack was never formally updated to recognize RHEL8 after the OS upgrade.

The fix itself is simple once you understand what refhost.xml does and why it matters. The broader lesson is that OS upgrades on EBS servers need to be accompanied by a review of the FMW prereq certification files and Oracle inventory configuration — not just the OS packages and kernel parameters.


Oracle EBS DBA | Exadata Specialist | AWS & AI Learner

Feel free to connect or comment if you faced the same issue.

Thursday, June 25, 2026

Oracle EBS Concurrent Manager — Inactive / No Manager: Root Cause, Diagnosis & Fix

Oracle EBS Concurrent Manager — Inactive / No Manager: Root Cause, Diagnosis & Fix

📊 Oracle EBS DBA Series

Oracle EBS Concurrent Manager
Inactive / No Manager

Root cause, diagnosis & fix — with SQL scripts, OS commands, and proactive monitoring tips

👤 Oracle EBS DBA Specialist Lead 📅 June 2026 🕐 7 min read 🏭 Database: WCGATDB

You submit a concurrent request in Oracle EBS — maybe an AP Invoice Import, a Payee Import, or a custom XX program — and instead of "Pending → Normal", you see the two most dreaded words on the Requests screen:

Request 919988 — XX Payee Import (Providers) Inactive No Manager

This article breaks down exactly what this means, why it happens, and the step-by-step DBA fix to resolve it fast — whether you are on-premise or on AWS.


What does "Inactive / No Manager" mean?

Oracle EBS uses the Concurrent Processing (CP) framework to run background jobs. Every request is handled by a Concurrent Manager — specifically by a Work Shift assigned to that manager that is active at the time.

When you see Inactive / No Manager, Oracle is telling you:

  • No Concurrent Manager is currently running that is eligible to process this request
  • The request matched no active Work Shift, or no manager is up
  • The Internal Concurrent Manager (ICM) may itself be down
💡 Tip
Think of the ICM as the "supervisor" and the specific managers (Standard, Payables, etc.) as "workers". If the supervisor is down, no worker gets assigned.

Common root causes

#Root CauseHow to Confirm
1Internal Concurrent Manager (ICM) is downCheck FNDSM / CM status in sysadmin
2Standard Manager work shift not covering current timeQuery FND_CONCURRENT_QUEUES
3No work shift defined for custom managerCheck manager config in System Admin
4Specific program assigned to manager with no active workersCheck manager specialization
5Database listener or APPS connection issueCheck alert.log, tnsping
6Adcmctl / OPMN services not started after patchingRun adcmctl.sh status
7OS-level adop / patching left CM in stopped stateReview recent patch history

Step-by-step diagnosis

Step 1 — Check CM status from the front end

  • Navigate to: System Administrator › Concurrent › Manager › Administer
  • Check that Internal Manager shows Active status
  • Check Standard Manager — Actual Processes should be > 0
  • Look for any manager showing 0 Actual / 0 Running

Step 2 — Check at the OS level (EBS App tier)

# Source the environment
. /home/applmgr/<CONTEXT_NAME>.env

# Check CM processes
ps -ef | grep FNDLIBR
ps -ef | grep ICM

# Check adcmctl status
adcmctl.sh status apps/<apps_pwd>

Step 3 — Query the database directly

-- Check manager status
SELECT CONCURRENT_QUEUE_NAME,
       MANAGER_TYPE,
       RUNNING_PROCESSES,
       MAX_PROCESSES,
       WORKER_COUNT
FROM   FND_CONCURRENT_QUEUES_VL
WHERE  ENABLED_FLAG = 'Y';

-- Check if ICM is alive
SELECT NODE_NAME, STATUS_CODE
FROM   FND_CP_SERVICES
WHERE  SERVICE_HANDLE = 'FNDCPGSC';

Step 4 — Check work shifts

SELECT Q.CONCURRENT_QUEUE_NAME,
       W.SHIFT_NAME,
       W.FROM_TIME,
       W.TO_TIME,
       W.WORKERS
FROM   FND_CONCURRENT_QUEUES Q,
       FND_CV_SHIFTS_V W
WHERE  Q.CONCURRENT_QUEUE_ID = W.CONCURRENT_QUEUE_ID;

The fix — how to resolve it

Fix A — Restart the Concurrent Manager (most common fix)

# Stop all concurrent managers
adcmctl.sh stop apps/<apps_password>

# Wait 30-60 seconds, verify all FNDLIBR processes are gone
ps -ef | grep FNDLIBR | grep -v grep

# Start concurrent managers
adcmctl.sh start apps/<apps_password>

# Verify startup
adcmctl.sh status apps/<apps_password>
⚠️ Warning
Never hard-kill (kill -9) the ICM without a full stop/start cycle. This corrupts the CM state in FND tables and requires manual cleanup.

Fix B — Verify work shifts are configured

  • Go to: System Administrator › Concurrent › Manager › Define
  • Select the relevant manager (e.g., Standard Manager or your custom XX manager)
  • Click Work Shifts button
  • Ensure a shift exists that covers the current time (or use "Any" shift = 24x7)
  • Set Workers to at least 1 (or match your workload)

Fix C — Deactivate & reactivate from Administer screen

  • Navigate to: System Administrator › Concurrent › Manager › Administer
  • Select the problematic manager
  • Click Deactivate, wait 10 seconds
  • Click Activate — this forces the ICM to reassign workers

Fix D — Resubmit the request

Once managers are confirmed Active with processes > 0, resubmit the original request. Oracle EBS does not automatically retry Inactive/No Manager requests — you must resubmit manually.


Real-world case: XX Payee Import (Providers)

Request ID 919988XX Payee Import (Providers) — was sitting with Phase: Inactive, Status: No Manager in database WCGATDB. Investigation revealed:

  • The Standard Manager was up but had 0 Actual Processes due to a stale CM lock
  • An adcmctl.sh stop/start resolved the stale lock
  • After restart, resubmitting moved the request to: Pending → Normal → Complete ✓
💡 Tip
Always check if this affects only ONE specific program or ALL requests. If all requests are stuck, it is an ICM issue. If only one program, check program specialization rules on that manager.

Prevention: proactive monitoring

CheckMethodFrequency
ICM runningps -ef + FND_CP_SERVICES queryEvery 5 min
Manager actual processes = 0FND_CONCURRENT_QUEUES_VL queryEvery 10 min
Requests stuck > 30 minFND_CONCURRENT_REQUESTS queryEvery 15 min
Alert log CM errorsgrep FNDLIBR alert.logHourly
adcmctl.sh status checkShell script + email alertDaily
-- Requests pending > 30 minutes with no manager
SELECT REQUEST_ID,
       CONCURRENT_PROGRAM_NAME,
       PHASE_CODE,
       STATUS_CODE,
       ROUND((SYSDATE - REQUEST_DATE)*1440,1) AS WAIT_MINS
FROM   FND_CONCURRENT_REQUESTS
WHERE  STATUS_CODE = 'I'
AND    PHASE_CODE  = 'I'
AND    (SYSDATE - REQUEST_DATE)*1440 > 30
ORDER  BY REQUEST_DATE;

Quick reference card

SymptomMost likely causeFirst action
All requests → No ManagerICM downadcmctl.sh stop/start
One program → No ManagerManager specialization / no shiftCheck Define Manager › Work Shifts
After patching → No ManagerCM not restarted post-patchadcmctl.sh start
Intermittent No ManagerWork shift gap (midnight window)Add 24x7 "Any" shift
No Manager after failoverCM pointed to wrong nodeCheck APPL_TOP / opmn.xml

Conclusion

The Inactive / No Manager error in Oracle EBS is almost always solvable quickly once you understand the Concurrent Manager architecture. The key steps are:

  1. Verify ICM and manager status from the Administer screen and OS
  2. Run adcmctl.sh stop/start if CM processes are absent
  3. Check work shifts if only specific programs are affected
  4. Resubmit the request — it will not auto-retry
  5. Add proactive monitoring to catch this before users report it

These day-to-day fixes are what separate a reactive DBA from a proactive one. If you found this useful, share it with your EBS DBA team.

#OracleEBS #ConcurrentManager #EBSDBA #OracleApps #NoManager #OracleDBA #EBSAdmin #Exadata #AWS

Friday, May 15, 2026

Oracle EBS R12: Create User & Assign Responsibility — Step-by-Step DBA Guide with SQL Verification

Oracle EBS R12: Create User & Assign Responsibility — Step-by-Step DBA Guide with SQL Verification

This guide explains how to create a user in Oracle E-Business Suite R12, assign a responsibility, and verify the setup using SQL queries.


1. Business Requirement

As an Oracle Apps DBA, you may receive a request to create a new EBS application user and assign required responsibilities.

Example Requirement:

Create EBS user       : MAHILANIA
Assign Responsibility : System Administrator
Application          : System Administration

2. Important Tables Used

Table Name Purpose
FND_USER Stores EBS application user details
FND_RESPONSIBILITY Stores responsibility details
FND_RESPONSIBILITY_TL Stores translated responsibility names
FND_APPLICATION Stores application details
FND_USER_RESP_GROUPS_DIRECT Stores direct user responsibility assignments

3. Source the EBS Environment

Login to the application tier as the application OS user and source the environment file.

cd $INST_TOP/ora/10.1.2
. <CONTEXT_NAME>.env

Or source the main EBS environment file:

. /u01/oracle/EBSapps.env run

4. Connect to SQL*Plus as APPS

sqlplus apps/<apps_password>

5. Create EBS User Using FND_USER_PKG

Use the standard Oracle seeded API FND_USER_PKG.CREATEUSER to create an application user.

BEGIN
  FND_USER_PKG.CREATEUSER(
    x_user_name              => 'MAHILANIA',
    x_owner                  => 'CUST',
    x_unencrypted_password   => 'Welcome123',
    x_start_date             => SYSDATE,
    x_end_date               => NULL,
    x_password_date          => SYSDATE,
    x_email_address          => 'mahilania@example.com'
  );

  COMMIT;
END;
/

Note: Replace the password and email address as per your organization policy.


6. Verify User Creation

SELECT user_id,
       user_name,
       start_date,
       end_date,
       email_address,
       creation_date
FROM   fnd_user
WHERE  user_name = 'MAHILANIA';

7. Find Responsibility Details

Before assigning a responsibility, find the correct responsibility name, responsibility ID, application ID, and security group ID.

SELECT fr.responsibility_id,
       fr.application_id,
       frt.responsibility_name,
       fa.application_short_name
FROM   fnd_responsibility fr,
       fnd_responsibility_tl frt,
       fnd_application fa
WHERE  fr.responsibility_id = frt.responsibility_id
AND    fr.application_id = frt.application_id
AND    fr.application_id = fa.application_id
AND    frt.language = USERENV('LANG')
AND    frt.responsibility_name LIKE 'System Administrator';

8. Assign Responsibility to User

Use FND_USER_PKG.ADDRESP to assign responsibility to the EBS user.

BEGIN
  FND_USER_PKG.ADDRESP(
    username       => 'MAHILANIA',
    resp_app       => 'SYSADMIN',
    resp_key       => 'SYSTEM_ADMINISTRATOR',
    security_group => 'STANDARD',
    description    => 'System Administrator responsibility assigned by Apps DBA',
    start_date     => SYSDATE,
    end_date       => NULL
  );

  COMMIT;
END;
/

9. Verify Responsibility Assignment

SELECT fu.user_name,
       frt.responsibility_name,
       fa.application_short_name,
       furg.start_date,
       furg.end_date
FROM   fnd_user fu,
       fnd_user_resp_groups_direct furg,
       fnd_responsibility_tl frt,
       fnd_responsibility fr,
       fnd_application fa
WHERE  fu.user_id = furg.user_id
AND    furg.responsibility_id = fr.responsibility_id
AND    furg.responsibility_application_id = fr.application_id
AND    fr.responsibility_id = frt.responsibility_id
AND    fr.application_id = frt.application_id
AND    fr.application_id = fa.application_id
AND    frt.language = USERENV('LANG')
AND    fu.user_name = 'MAHILANIA';

10. Check User Login Status

SELECT user_name,
       start_date,
       end_date,
       password_date,
       password_lifespan_days,
       password_accesses_left
FROM   fnd_user
WHERE  user_name = 'MAHILANIA';

11. End Date a Responsibility

If you need to remove access, do not delete records directly. End-date the responsibility using Oracle API.

BEGIN
  FND_USER_PKG.DELRESP(
    username       => 'MAHILANIA',
    resp_app       => 'SYSADMIN',
    resp_key       => 'SYSTEM_ADMINISTRATOR',
    security_group => 'STANDARD'
  );

  COMMIT;
END;
/

12. End Date an EBS User

UPDATE fnd_user
SET    end_date = SYSDATE
WHERE  user_name = 'MAHILANIA';

COMMIT;

13. Common Issues

Issue Possible Cause Action
User not visible in EBS User not committed or wrong username Verify in FND_USER
Responsibility not visible after login Incorrect responsibility key or application short name Verify responsibility details using SQL
Password issue Password policy restriction Reset password from System Administrator responsibility
Responsibility expired End date is already set Check FND_USER_RESP_GROUPS_DIRECT

14. Best Practices for Apps DBA

  • Always use Oracle seeded APIs where possible.
  • Do not directly insert records into FND tables.
  • Take approval before granting powerful responsibilities.
  • Use strong password policies.
  • Validate user and responsibility assignment using SQL.
  • End-date users when access is no longer required.
  • Keep audit details for production access changes.

15. Quick Validation Script

SET LINES 200
COL user_name FORMAT A20
COL responsibility_name FORMAT A40
COL application_short_name FORMAT A20

SELECT fu.user_name,
       frt.responsibility_name,
       fa.application_short_name,
       furg.start_date,
       furg.end_date
FROM   fnd_user fu,
       fnd_user_resp_groups_direct furg,
       fnd_responsibility_tl frt,
       fnd_responsibility fr,
       fnd_application fa
WHERE  fu.user_id = furg.user_id
AND    furg.responsibility_id = fr.responsibility_id
AND    furg.responsibility_application_id = fr.application_id
AND    fr.responsibility_id = frt.responsibility_id
AND    fr.application_id = frt.application_id
AND    fr.application_id = fa.application_id
AND    frt.language = USERENV('LANG')
AND    fu.user_name = UPPER('&USER_NAME');

Conclusion

Creating an Oracle EBS R12 user and assigning responsibility is a common Apps DBA activity. The safest approach is to use Oracle seeded APIs such as FND_USER_PKG.CREATEUSER and FND_USER_PKG.ADDRESP. Always verify the user and responsibility assignment from backend tables before confirming access to the business team.

Author: Punit Kumar
Role: Oracle Apps DBA / Oracle DBA Specialist

Tuesday, May 12, 2026

How to Enable HTTPS on Oracle EBS R12.2

punitoracledba.blogspot.com  ·  EBS R12.2 + Okta SSO Series  · 
SSL / HTTPS  ·  Phase 1 Prerequisite

How to Enable HTTPS on Oracle EBS R12.2 — Step by Step

Before Okta SSO can work, your EBS environment needs HTTPS. This guide covers Oracle Wallet creation, OHS configuration, and going live on port 443 — with exact commands for your environment.

punitoracledba   ·   EBS R12.2.13  ·  RHEL 8  ·  OHS 12.2.x   ·   ~10 min read
EBS R12.2.13 + Okta SSO Implementation

Why HTTPS First?

Okta is a cloud-based Identity Provider (IdP) that communicates over SAML 2.0. Every SAML assertion it sends contains sensitive authentication tokens. Without HTTPS, those tokens travel in plain text — and Okta simply refuses to integrate with HTTP endpoints. No SSL = no SSO. Full stop.

In this post, we configure HTTPS on Oracle HTTP Server (OHS) for EBS R12.2.13 running on RHEL 8, using an Oracle Wallet with a self-signed certificate on port 443.

Note: For production environments, replace the self-signed certificate with one from your internal CA or a trusted CA (DigiCert, Sectigo, etc.). All other steps remain identical.

Environment Reference

Component Value
Application serverpc.app.com
Database serverpc.db.com : 1533
Current EBS URLhttp://pc.app.com:8012
Target HTTPS URLhttps://pc.app.com:443
OSRHEL 8
OHS versionOHS 12.2.x (EBS R12.2.13)
Certificate typeSelf-signed (lab/dev)
Step 1
Locate Your OHS Instance & Wallet Directory

Log in to pc.app.com as your EBS OS user (typically applmgr) and run:

bash — find OHS paths
echo $INST_TOP

find $INST_TOP -name "cwallet.sso" 2>/dev/null
find $INST_TOP -name "wallet" -type d 2>/dev/null

Typical wallet location:

$INST_TOP/ora/10.1.3/Apache/Apache/conf/ssl.wlt/default/
Step 2
Verify orapki Is Available

EBS R12.2 OHS uses the Oracle Wallet — not openssl. The tool is orapki.

bash — verify orapki
export PATH=$ORACLE_HOME/bin:$PATH
which orapki
orapki version
Tip: If orapki is not found, source your EBS env file:
source $INST_TOP/ora/10.1.3/Apache/Apache/bin/envvar.sh
Step 3
Create the Oracle Wallet
bash — create wallet directory
mkdir -p $INST_TOP/ora/10.1.3/Apache/Apache/conf/ssl.wlt/default
cd $INST_TOP/ora/10.1.3/Apache/Apache/conf/ssl.wlt/default
bash — create wallet with auto-login
orapki wallet create \
  -wallet $INST_TOP/ora/10.1.3/Apache/Apache/conf/ssl.wlt/default \
  -pwd WalletPasswd123 \
  -auto_login

The -auto_login flag creates cwallet.sso — allows OHS to start without a password prompt on server restarts.

Step 4
Generate the Self-Signed Certificate
bash — add self-signed certificate (10-year validity)
orapki wallet add \
  -wallet $INST_TOP/ora/10.1.3/Apache/Apache/conf/ssl.wlt/default \
  -pwd WalletPasswd123 \
  -dn "CN=pc.app.com,OU=IT,O=YourOrg,L=City,ST=State,C=US" \
  -keysize 2048 \
  -self_signed \
  -validity 3650

Verify the certificate was added:

bash — display wallet contents
orapki wallet display \
  -wallet $INST_TOP/ora/10.1.3/Apache/Apache/conf/ssl.wlt/default \
  -pwd WalletPasswd123
expected output
User Certificates:
Subject: CN=pc.app.com,OU=IT,O=YourOrg,L=City,ST=State,C=US
Step 5
Configure ssl.conf for Port 443
bash — backup and edit ssl.conf
cp $INST_TOP/ora/10.1.3/Apache/Apache/conf/ssl.conf \
   $INST_TOP/ora/10.1.3/Apache/Apache/conf/ssl.conf.bkp_$(date +%Y%m%d)

vi $INST_TOP/ora/10.1.3/Apache/Apache/conf/ssl.conf

Set these key directives inside ssl.conf:

ssl.conf — key settings
Listen 443
SSLEngine on

<VirtualHost pc.app.com:443>
  ServerName pc.app.com:443
  SSLWallet "$INST_TOP/ora/10.1.3/Apache/Apache/conf/ssl.wlt/default"
  SSLProtocol TLSv1.2
  SSLCipherSuite HIGH:!aNULL:!MD5
</VirtualHost>
Always back up config files before editing. The $(date +%Y%m%d) suffix keeps backups organised by date.
Step 6
Update httpd.conf
httpd.conf — verify these lines exist
Listen 80
Listen 443
Include conf/ssl.conf
Step 7
Update EBS Context File & Run AutoConfig

This is the step most DBAs miss. The context file drives all generated EBS configuration. Skip this and your EBS URLs will still point to HTTP even after OHS is serving HTTPS.

context file — update these parameters
<s_webentryhost>pc.app.com</s_webentryhost>
<s_webentryurlport>443</s_webentryurlport>
<s_login_page>https://pc.app.com:443/OA_HTML/AppsLocalLogin.jsp</s_login_page>
<s_external_url>https://pc.app.com:443</s_external_url>
bash — run AutoConfig
cd $ADMIN_SCRIPTS_HOME
./adautocfg.sh
Step 8
Open Port 443 on RHEL 8 Firewall
bash — firewalld + SELinux
sudo firewall-cmd --permanent --add-port=443/tcp
sudo firewall-cmd --reload

# If SELinux is Enforcing
getenforce
sudo semanage port -a -t http_port_t -p tcp 443
Step 9
Bounce OHS & Test HTTPS
bash — restart and verify
$ADMIN_SCRIPTS_HOME/adapcctl.sh stop
$ADMIN_SCRIPTS_HOME/adapcctl.sh start
$ADMIN_SCRIPTS_HOME/adapcctl.sh status

# Test HTTPS (-k bypasses self-signed cert warning)
curl -k -I https://pc.app.com/OA_HTML/AppsLocalLogin.jsp
Expected result: HTTP/1.1 200 OK — HTTPS is live!

Final Verification Checklist

Check Command Expected
Wallet createdls ssl.wlt/default/✓ cwallet.sso + ewallet.p12
Certificate addedorapki wallet display✓ CN=pc.app.com
OHS runningadapcctl.sh status✓ Running
Port 443 opencurl -k https://pc.app.com✓ HTTP 200 OK
AutoConfig doneadautocfg.sh✓ Completed
Context file updatedgrep 443 $CONTEXT_FILE✓ Shows port 443

What's Next?

With HTTPS confirmed on https://pc.app.com, your environment is ready to receive Okta SAML assertions securely. In Part 2 of this series, we deploy the Oracle EBS Asserter on WebLogic — the middleware that translates Okta's SAML token into an EBS session.

Hit any issues? Drop a comment with the error message and I'll help troubleshoot.

Oracle EBS R12.2 HTTPS OHS Oracle Wallet orapki SSL Okta SSO RHEL 8
Written by
punitoracledba
Oracle DBA Specialist Lead | Oracle EBS DBA | AWS & AI Learner. Turning real-world database experience into practical knowledge. Follow the full EBS R12.2 + Okta SSO series at punitoracledba.blogspot.com

Tuesday, February 24, 2026

WebLogic Admin Console access issue: Connection rejected, filter blocked Socket, weblogic.security.net.FilterException: [Security:090220] rule 2 (Oracle EBS 12.2)

Fixing WebLogic FilterException [Security:090220] rule 2 in Oracle EBS 12.2

Fixing WebLogic Admin Console Access Error in Oracle EBS 12.2

Error Message

The Server is not able to service this request:
[Socket:000445] Connection rejected, filter blocked Socket
weblogic.security.net.FilterException: [Security:090220] rule 2

Root Cause

In Oracle E-Business Suite 12.2, WebLogic connection filtering is enabled as part of security hardening. If your client IP is not allow-listed, WebLogic blocks the request using a deny rule.

Typical deny rule inside config.xml:

<connection-filter-rule>0.0.0.0/0 * * deny</connection-filter-rule>

If your IP does not match an allow rule, WebLogic applies the deny rule (often rule 2), which results in the error:

[Security:090220] rule 2

Quick Verification Steps

  1. Check AdminServer log:
    cd $EBS_DOMAIN_HOME/servers/AdminServer/logs
    tail -200 AdminServer.log
    
  2. Identify the blocked client IP address.
  3. Verify whether your IP exists in the trusted host configuration.

Emergency Recovery (If Completely Locked Out)

Important: This should be used only temporarily to regain access.

Step 1 – Stop Application Tier

adstpall.sh apps/APPS_PASSWORD

Step 2 – Backup and Edit config.xml

cd $EBS_DOMAIN_HOME/config
cp -p config.xml config.xml.bak
vi config.xml

Locate this line:

<connection-filter-rule>0.0.0.0/0 * * deny</connection-filter-rule>

Add allow to it:

<connection-filter-rule>0.0.0.0/0 * * allow</connection-filter-rule>

Temporarily comment or remove it:

<!-- <connection-filter-rule>0.0.0.0/0 * * deny</connection-filter-rule> -->

Step 3 – Start Application Tier

adstrtal.sh apps/APPS_PASSWORD

Now try accessing the WebLogic Admin Console again.


Permanent Fix (Recommended Solution)

  1. Update the EBS context variable for trusted admin nodes (for example: s_wls_admin_console_access_nodes).
  2. Add only approved IP addresses (such as bastion host or corporate VPN egress IP).
  3. Run AutoConfig:
    adautocfg.sh
    
  4. Restart services:
    adstpall.sh apps/APPS_PASSWORD
    adstrtal.sh apps/APPS_PASSWORD
    

Best Practice

  • Use a Bastion or Jump Host with a fixed IP.
  • Allow only trusted admin IPs.
  • Keep the global deny rule enabled.
  • Avoid permanent manual edits in config.xml.

Conclusion

The error "[Security:090220] rule 2" is not a WebLogic failure. It is a security configuration blocking unauthorized access. Properly maintaining trusted host configuration ensures both security and availability.

Saturday, February 7, 2026

Where Can I Find EBS 12.2.15 Documentation?

Where Can I Find EBS 12.2.15 Documentation?


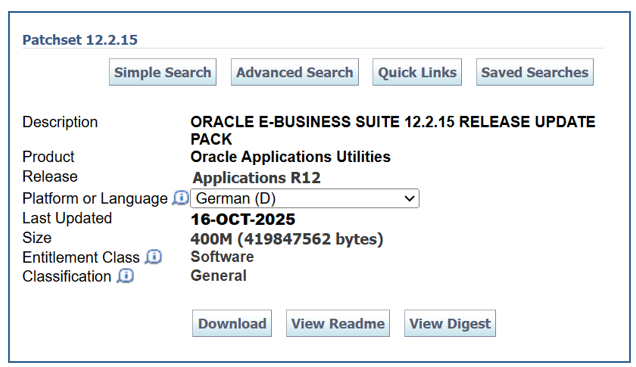
 EBS -12.2.15 to E-Business Suite 12.2. It can be applied online — you do not need to take your EBS environment down to apply this update. Our online E-Business Suite Documentation Web Library always contains the latest versions of all of our guides, including our Installation Guides, Upgrade Guides, and Readme Notes:

The EBS 12.2.15 release update pack (RUP) is delivered on My Oracle Support as 

Patch 37182900. Instructions for downloading and applying this latest RUP on top of the EBS 12.2 codeline can be found here:

EBS 12.2.15

Key Highlights of EBS 12.2.15

1️⃣ Introduction of “What’s New” Home Experience

One of the most visible improvements in this release is the introduction of a centralized “What’s New” documentation hub.

This new framework helps both technical and functional users easily understand enhancements introduced in each release. The documentation is organized by product families and includes:

  • Detailed feature descriptions

  • Screenshots demonstrating new capabilities

  • Configuration and setup instructions

  • Practical usage recommendations

Previously, organizations had to rely heavily on Release Content Documents (RCDs) and Transfer of Information (TOI) presentations. The new approach significantly simplifies feature discovery and improves adoption.


2️⃣ Fully Cumulative Update

EBS 12.2.15 is a cumulative release, which means:

  • It includes all fixes and improvements from previous 12.2 updates

  • It bundles previously released one-off patches

  • It reduces patching complexity for customers catching up on maintenance

For organizations running older 12.2 releases, this significantly reduces the number of patches required to reach the latest supported level.


3️⃣ Online Patching Support

One of the biggest strengths of the EBS 12.2 architecture remains intact.

The 12.2.15 RUP can be applied using:

👉 Online Patching (ADOP)

This allows patching while the production system remains available to users, minimizing downtime and business disruption. This capability continues to be a major differentiator of EBS 12.2 compared to earlier versions.


🔄 Upgrade Path to EBS 12.2.15

A common question customers ask is whether they need intermediate upgrades.

The answer is simple:

✔ Any existing EBS 12.2.x environment can directly apply the 12.2.15 RUP.

There is no need to apply intermediate release updates unless required for compatibility or internal testing requirements.


Oracle EBS Monitoring Analyzer – A Proactive Health Check Tool Every Apps DBA Should Use

Maintaining the health and stability of an Oracle E-Business Suite (EBS) environment requires continuous monitoring, proactive troubleshooting, and periodic validation of system configurations. In large enterprise environments where EBS supports critical business operations such as Financials, Supply Chain, HRMS, and Manufacturing, even minor configuration deviations can lead to performance degradation or functional failures.

During my recent EBS administration and support activities, I revisited one of the most powerful and underrated diagnostic utilities provided by Oracle Support — the Oracle EBS Monitoring Analyzer.

In this article, I will explain what the Monitoring Analyzer is, why it is essential for Apps DBAs and functional teams, and how to install, execute, and interpret its results effectively.


What is Oracle EBS Monitoring Analyzer?

The Monitoring Analyzer is a diagnostic health-check utility developed by Oracle Support. It is designed to analyze Oracle EBS environments and provide actionable insights into configuration settings, known issues, and best practice recommendations.

The analyzer works as a self-service script that:

  • Reviews EBS configuration parameters

  • Identifies known product and setup issues

  • Provides corrective action recommendations

  • Suggests best practice improvements

  • Helps Oracle Support Engineers during SR troubleshooting

One of the most important characteristics of this tool is that it is completely non-intrusive.

No data modification

Why Monitoring Analyzer is Important

In most real-world EBS environments, system issues are often caused by configuration drift, incomplete setups, or overlooked best practices rather than software defects.

The Monitoring Analyzer helps organizations move from reactive troubleshooting to proactive maintenance.

Key Advantages

  •  Early detection of configuration issues
  •  Improved environment stability
  • Faster root cause analysis
  • Simplified Oracle SR diagnostics
  • Preventive maintenance capability
  • Performance optimization recommendations✔ No inserts, updates, or deletes

Only reads and reports configuration data

This makes it safe to run even in production environments.

Target Audience

The Monitoring Analyzer is beneficial across both technical and functional teams.

Apps DBAs and System Administrators

  • Execute analyzer scripts

  • Validate environment configuration

  • Review performance and stability warnings

Functional Consultants and Business Analysts

  • Review module specific recommendations

  • Identify functional setup gaps

  • Validate business process configuration


Key Benefits of Monitoring Analyzer

The analyzer provides:

✔ Instant health-check reports
✔ Detailed HTML output for easy review
✔ Known issue identification
✔ Best practice guidance
✔ Oracle Support data collection assistance


Downloading the Latest Monitoring Analyzer

Oracle continuously updates analyzer scripts to incorporate newly identified issues and validation checks. Therefore, always ensure you are using the latest available version.

Example package:

mon_analyzer_200.18.zip

 Installing and Running Monitoring Analyzer

Monitoring Analyzer can be executed using two different approaches:

1️⃣ Running as a Concurrent Program
2️⃣ Running via SQL*Plus

Both methods are widely used depending on administrative requirements.


Method 1 – Running Monitoring Analyzer as Concurrent Request

This is the preferred approach when functional teams need access without requiring database credentials.


Step 1: Install Analyzer Package

Login as APPS user and execute:

sqlplus apps/<password> SQL> @mon_analyzer.sql

This step creates the analyzer package in the EBS database.

This step must be repeated whenever a new analyzer version is downloaded.


Step 2: Register Concurrent Program

Upload the concurrent program definition using FNDLOAD utility.

FNDLOAD apps/<password> 0 Y UPLOAD \ $FND_TOP/patch/115/import/afcpprog.lct \ MONAZ.ldt CUSTOM_MODE=FORCE

This creates the concurrent program called Monitoring Analyzer.


Step 3: Assign Program to Responsibility

Navigate to:

System Administrator → Security → Responsibility → Define

Identify the request group associated with the responsibility and add:

Monitoring Analyzer

Save the configuration.


Step 4: Execute Analyzer

Navigate to:

Processes and ReportsSubmit Request

Submit request:

Monitoring Analyzer

Ensure language setting is:

American English

Step 5: Review Output

Once the request completes:

  • Click View Output

  • Save the output locally as:

Web Page, HTML only

Conclusion

Oracle EBS Monitoring Analyzer is an extremely valuable diagnostic utility

that enables proactive monitoring and preventive maintenance of

Oracle E-Business Suite

Reference

Oracle Support Documentation

Monitoring Analyzer – MOS Doc ID 2886645.1.